Starlink is a satellite internet constellation being constructed by SpaceX to provide satellite Internet access. The constellation will consist of thousands of mass-produced small satellites in low Earth orbit (LEO), which communicate with designated ground transceivers. The goal of Starlink is to provide high-speed internet access to users around the world, with a focus on underserved and remote areas where traditional internet infrastructure is not available or is unreliable. The service aims to offer a competitive alternative to existing internet service providers by providing improved speed, latency, and overall reliability.
Two things you need to bear in mind.
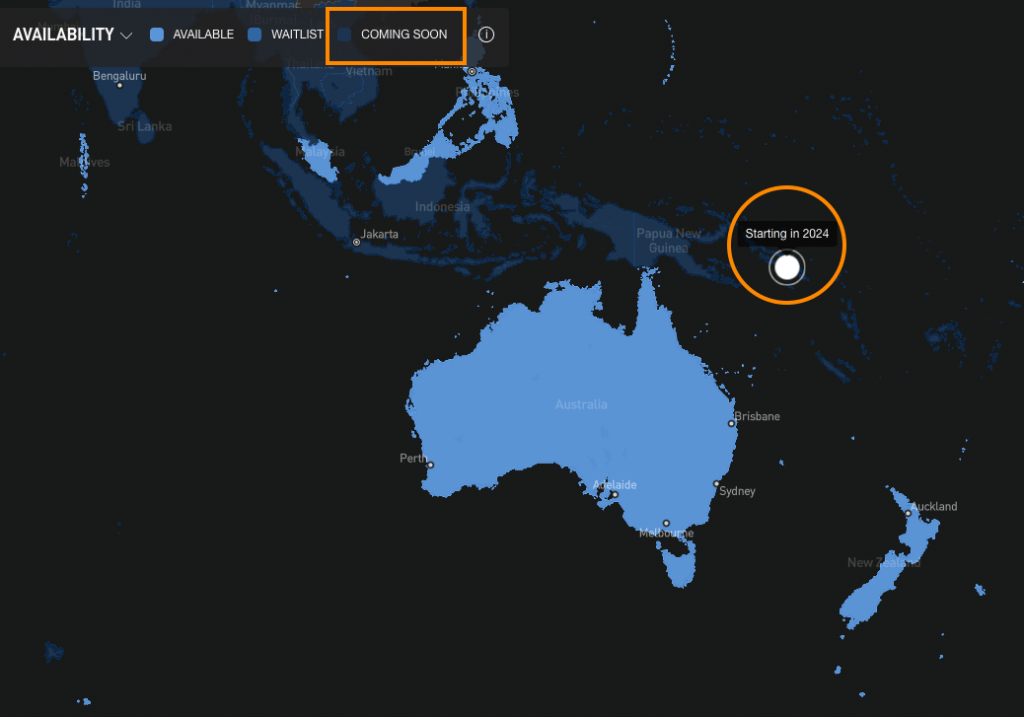
- Starlink Service Coverage is unavailable for Solomon Islands – see the map here. If you try to order a kit you will pay USD 9 to be on the waitlist.
- Starlink is pending regulatory approval in the Solomon Islands (Telecommunications Solomon Islands) – I did not know why it took so long but I do understand this requires collective thoughts.
I’ve heard many people ask the same question over and over again, Is it illegal to use Starlink in the Solomon Islands?
- Well, I have my own view but I leave it to you to research on this. Do have a read on the TCSI (regulator) website and the Telecommunications Act 2009 and leave your thoughts in the comment section below this post.
- Read about Samoa’s action regarding this service here.
Disclaimer: You bring the kit into the country at your own choice and risk. This post is meant for information and educational purposes only.
Step 1 – Get your Starlink hardware kit (Gen 2)
UPDATE: Preorder the new Starlink Standard Kit (Latest Generation) slated for release on April 11, 2024. Available now at JB HI-FI for $599AUD. For more details, visit the preorder page.
1. Order direct from Starlink
To order a Starlink terminal, customers must use an address in an eligible (Service Coverage) country, such as Australia or New Zealand, and from there they can arrange to ship it to the Solomon Islands.
But if you can get the kit from an authorized reseller in Australia or NZ for the same price, why order directly from Starlink?
2. Buy from Starlink authorized resellers
There is a link at the footer of the Starlink website that lists all Authorized Resellers.
In Australia, The Standard Kit at JB Hi-Fi costs AUD 399, which is equivalent to SBD 2,154.40(It could be more depending on the banks exchange rate). You can view the kit on this link. If you have a family member or friend living in Australia, you can purchase the kit and have it shipped to their address. Alternatively, you can ask a friend or family member to bring a kit when they are travelling.
This is my recommended option for Solomon Islanders at the moment. Flights from Brisbane or NZ are frequent nowadays, I think twice every week.
3. Purchase from local businesses
If you are on a budget, this may not be the best option, as the price is going to be significantly higher than the original price. It is advised to explore other options first before considering this one.
| Company | Service | Contact |
|---|---|---|
| Satsol | Starlink Kit Subscription One-Time Payment Site installation fee | Josiah Maefonea (Sales Manager) [email protected] / [email protected] +677 22422 Level 2, Unit 2.4B, Anthony Saru Bldg, Hibiscus Avenue, PO BOX 2272 |
| Advance Technologies Ltd | Starlink Terminal One-Off payment | Sales +677 21922 [email protected] |
| Solitech Solutions | Starlink Terminal Installation Fee Subscription One-Off Payment | Enquiries [email protected] Common Wealth Street https://www.solitech.solutions/ |
If you have the money and do not want to deal with the logistics of bringing in the kit, this is a good option.
Step 2 – Unbox your Starlink kit
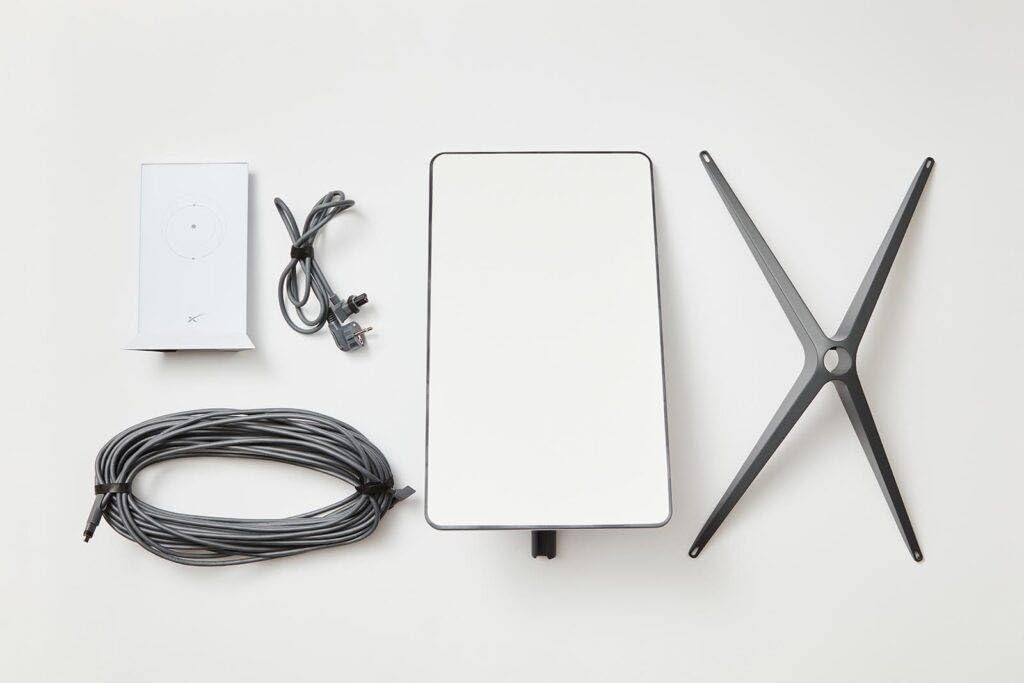
Once you have your kit, the first step in setting up your Starlink system is to unbox it. The kit includes the following components:
- 1 x Starlink Dish
- 1 x Starlink Base
- 1 x Starlink Router
- 1 x Starlink Cable (15.2m)
- 1 x AC cable (1.8m)
Ensure you have all the necessary components before proceeding to the next step.
Step 3 – Mount the dish
Next, you’ll need to choose a location for your Starlink dish. The dish needs a clear view of the sky to connect to the Starlink satellites. You can use the Starlink app to help you find the best location for your dish.

Once you’ve chosen a location, you can mount the dish. The dish can be mounted on a tripod, a roof mount, or a wall mount. Follow the instructions in the Starlink app to mount the dish securely. Please check the Starling shop for the types of mountings available, if the one that comes with the kit can’t be mounted to your roof.
Step 4 – Connect the dish to the router
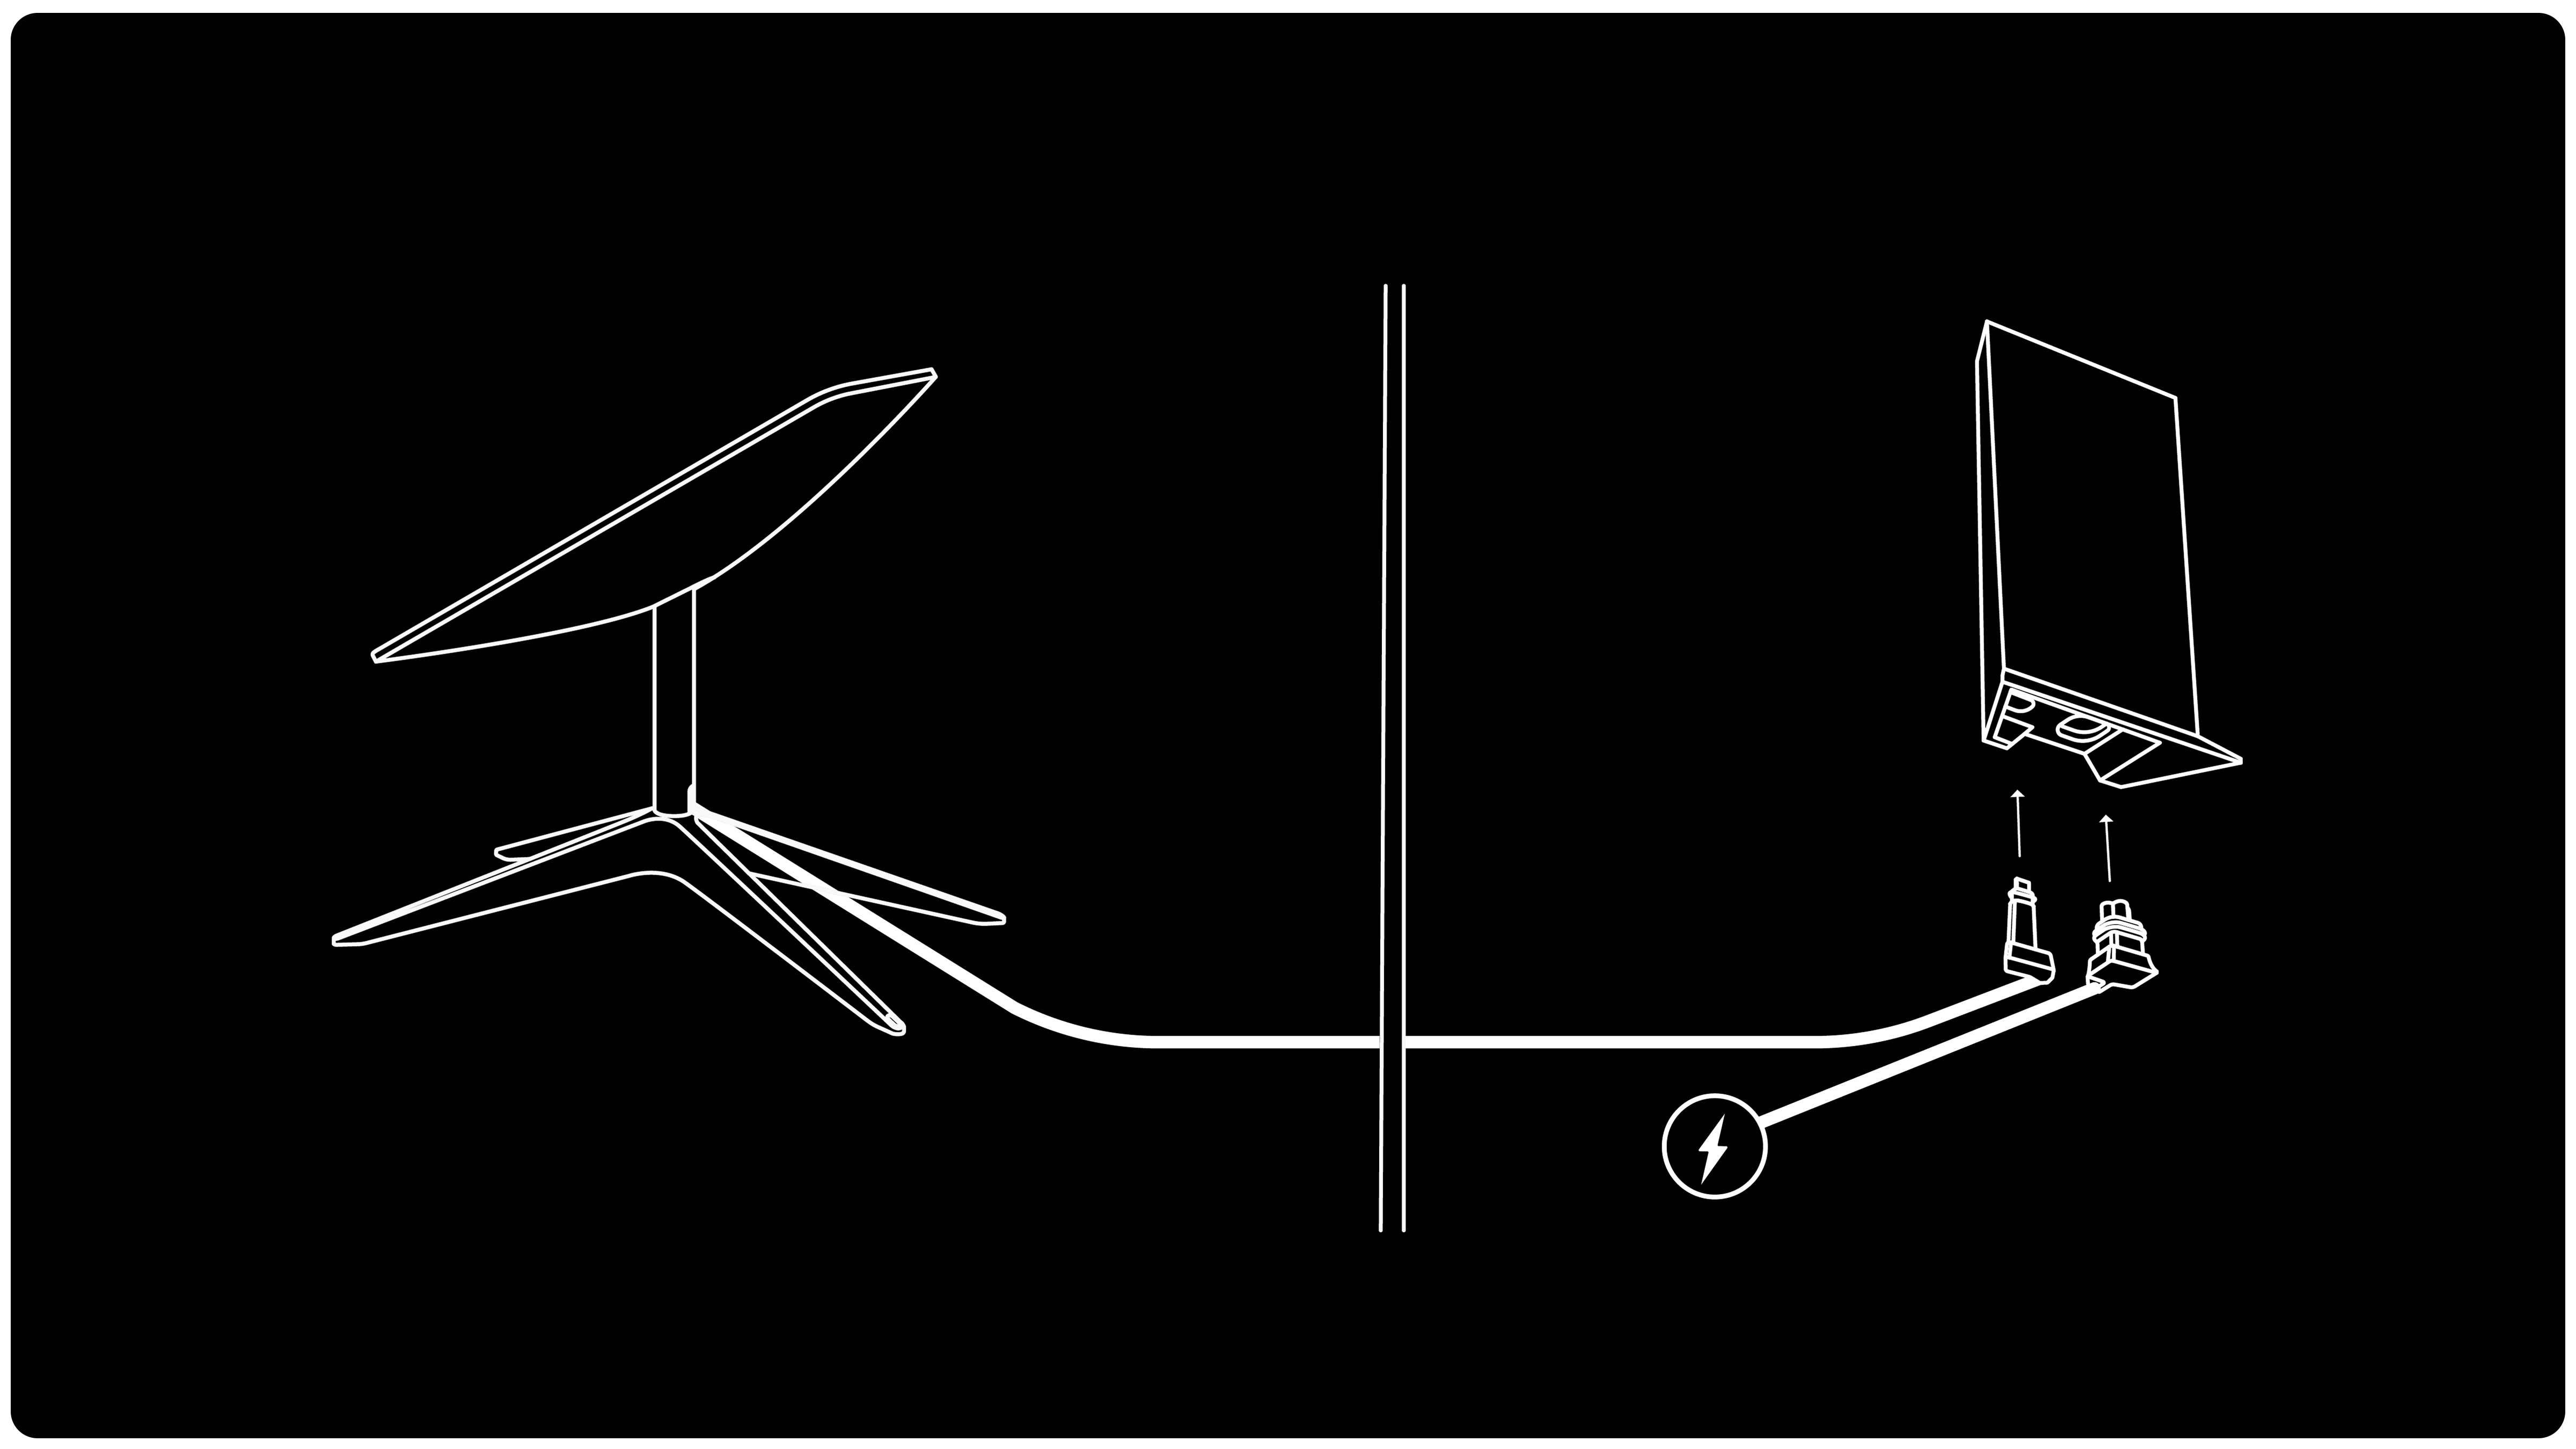
After you’ve mounted the dish, you’ll need to connect it to the Starlink router. Connect one end of the cable to the dish and the other end to the router. The router will automatically connect to the dish and establish a connection to the Starlink network.
Step 5 – Activate your Starlink service
It is recommended to use either the Starlink Android or iOS mobile app to do this step.
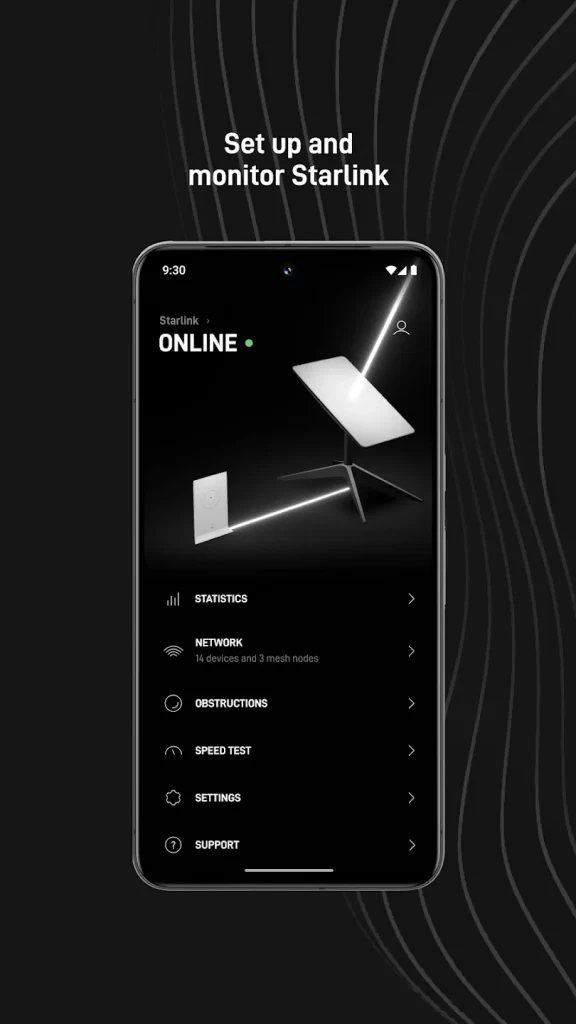
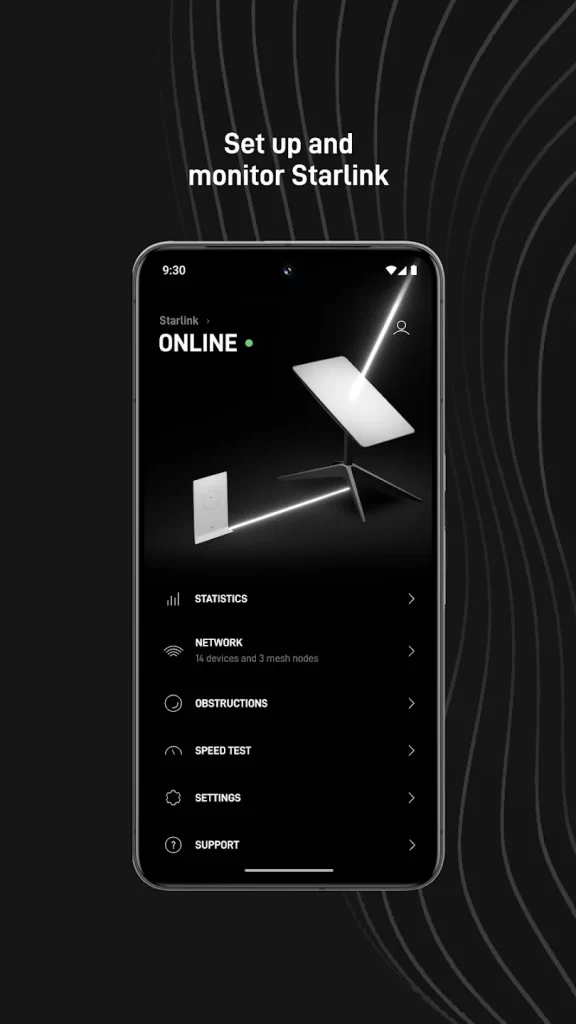
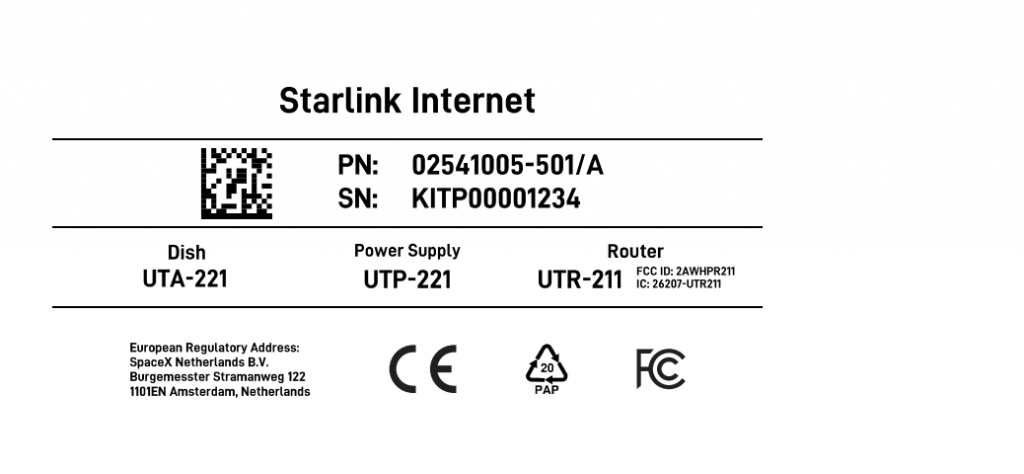
Once your Starlink system is connected, you can activate your service using your Starlink Identifier. One identifier is the KIT number (Ex. KITP00001234) located on the shipping label. See the below image of sample KIT #.
Initiate the activation process from within the Starlink app and follow the on-screen instructions.
Note, there is also a setup URL provided in the kit – https://setup.starlink.com
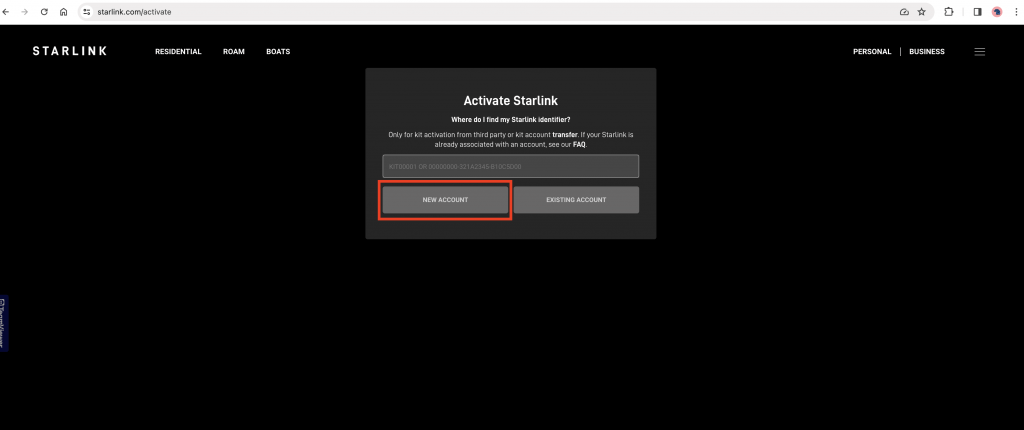
Next, you will be prompted to enter the following:
- KIT Number (Found on the label stick on your kit box) or Serial # (Found under the dish near the end where the cable is connected)
- Contact Details
- Valid Phone Number
- Address/Postal Code
- Billing Details
- Full Name
- Valid Visa or Credit Card – I use a BRED Visa Card (Switched from BSP Visa and never look back, highly recommend Bred Bank)
- Service Plan
Global Mobile $300AUD- MOBILE – REGIONAL $174 AUD
The service plan to choose is MOBILE – REGIONAL. It is AUD 174 which is ~ SBD 956.44 per month.
Step 6 – Connect to Wi-Fi and enjoy high-speed internet

Before you try to connect to the WiFi, ensure that your device’s date and time settings are accurate. Incorrect settings can cause issues when trying to access the internet.
After completing the activation process, you can connect your devices to the Starlink network and enjoy high-speed internet. You can use the Starlink app to monitor your connection and make any necessary adjustments to your dish’s position.
BOTTOM LINE – I hope this information helps you save money. It’s so easy that you can set it up on your own without spending anything. 😊
Hi can we use solomon islands number when making an account?
Yes.
Thanks for the Information Wei
Do we need to buy the KIT locally or we can import them?
Thank you for this very clear step by step info. I’m still waiting for my new Visa card from BSP 😂 very slow